Create Beautiful Spaces with Nicole.
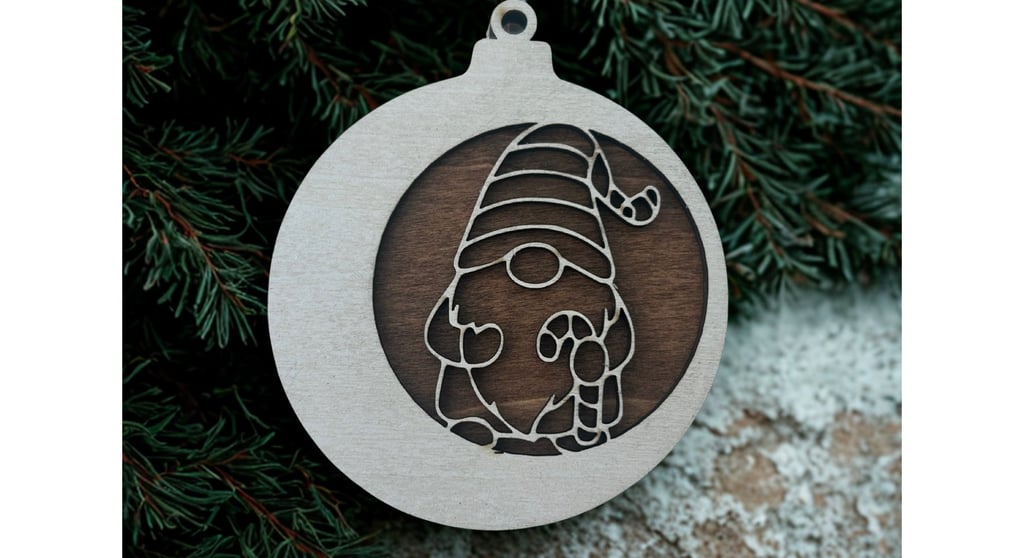
DIY Laser Cut Christmas Gnome Ornament: Step-by-Step Guide
Looking for a festive craft project to get you in the holiday spirit? This laser cut Christmas gnome ornament combines woodworking, creativity, and a touch of tech — making it an ideal project for both crafting beginners and laser cutting enthusiasts. In this guide, I’ll walk you through how to prepare, cut, and assemble your very own gnome ornament using basswood, paint, and a laser cutter.
11/15/20252 min read
Materials You’ll Need
Basswood sheets — Buy 1/8” basswood on Amazon
Transfer Tape
Wood stain
Acrylic paint
Double-sided adhesive sheets or tape
Laser cutter — WeCreat/ xTool M1 / Glowforge
Fine sandpaper
Paintbrushes or foam brushes
Protective gloves & rags
Step 1: Prepare the First Piece of Basswood
Start with your first sheet of basswood.
Apply transfer tape to one side. This will help reduce burn marks caused by the laser.
Flip the board over and apply wood stain to the other side using a rag or brush.
Let it dry completely before moving to the next step.
You can choose a warm walnut stain for a rustic look or a lighter oak tone for Scandinavian charm.
Pro Tip: Use smooth, even strokes when staining for a professional finish.
Step 2: Prepare the Second Piece of Basswood
Take your second sheet of basswood and:
Apply double-sided adhesive tape sheets to one side.
This will make assembly easy later by turning it into a peel-and-stick surface.
Paint the other side using your preferred holiday colors (reds, greens, whites, or metallic accents).
Acrylic paint works great for this.
Allow it to dry thoroughly.
Now you have one stained board for the background and one painted board for extra contrast!
Step 3: Set Up Your Laser Cutter
Load your prepared sheets into your laser cutter. I personally have the WeCreat 20W laser.
Open your laser design software (such as WeCreat MakeIt!, LightBurn, xTool Creative Space, or Glowforge App).
Import your gnome ornament design file.
You can make your own or find holiday SVG cut files online. Creative Fabrica is great for files.
Position the design and check that your materials are correctly aligned.
Adjust your power and speed settings for basswood (usually around 3mm thick).
Once everything looks good, send to your machine.
Watch your laser bring this festive design to life as it carefully carves out your Christmas gnome pieces!
Step 4: Assemble the Ornament
Once both wood pieces are cut:
Gently remove the shapes from the laser bed.
Peel off the backing of the adhesive sheet from your second piece.
Align and press the two pieces together carefully — the adhesive will secure them in place.
If you want to hang your ornament, add a small twine loop or ribbon through the top.
Give it a final touch by adding a bit of shimmer paint or a small pom-pom to your gnome’s hat!
Step 5: Enjoy and Display
You’ve just created a charming laser cut Christmas gnome ornament!
Hang it on your tree, use it as a stocking tag, or gift it to a friend. Each one you make can have a unique twist by switching up stains, paint colors, or hat shapes.
Tips & Ideas
Layer different materials, like acrylic for the hat or felt for the beard.
Make a matching set of gnomes for a rustic woodland theme.
Personalize each with engraved names or laser-etched patterns.
Affiliate Disclosure:
This post contains affiliate links. If you purchase through these links, I may earn a small commission at no extra cost to you — helping me keep these DIY tutorials coming your way.